How to Clean Your Garlic Press With Ease
The easiest way to clean a garlic press is to empty it right after use, rinse away the loose garlic, and scrub the holes with a small brush and dish soap. If the garlic has dried, soften it in warm, soapy water before brushing. A clean toothbrush reserved for kitchen utensils works well for the small corners.
What you’ll need
- Warm water and dish soap
- A small dish brush or a new toothbrush reserved for kitchen cleaning
- The press’s cleaning tool, if it came with one
- A clean towel or drying rack
Check your press’s care instructions first, especially before soaking it or putting it in the dishwasher. Open removable baskets or hinged grids only as the manufacturer directs; don’t force parts apart.
How to clean a garlic press by hand
1. Empty the chamber
Open the handles and remove the flattened garlic pulp and any peel left inside. Put those scraps in the compost or trash rather than washing a clump down the drain.
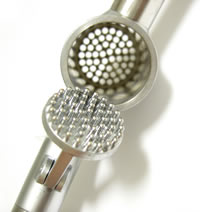
If your press has a built-in cleaner, use it to push trapped garlic out of the holes. Some models work by reversing the handles; others have a separate cleaning piece. Zyliss recommends removing trapped garlic before it dries, which is a useful habit regardless of the style of press you own.
2. Rinse before the garlic dries
Hold the press open under warm running water. Rinse both the inside of the chamber and the outside of the perforated plate. Directing water through the holes from the outside can help move loose pieces back into the chamber, where they’re easier to remove.
3. Brush the holes and hinge
Add a little dish soap to your damp brush. Scrub both sides of the pressing plate with short strokes, then work around the chamber’s corners, the plunger, and the hinge. Keep the handles open so you can reach the surfaces that touch the garlic.
Use a brush with intact bristles, and rinse away loosened pieces as you work. Avoid digging through the holes with a knife or metal skewer.
4. Rinse, inspect, and dry
Rinse off the soap, then hold the pressing plate toward a light to check for blocked holes. Brush any remaining spots again. Check under a removable basket and around the hinge, too.
Dry with a clean towel and leave the press open on a rack until moisture in the hinge and crevices has dried before putting it away. Wash and rinse the cleaning brush, then let it air-dry.
What if the garlic is dried on?
If the manufacturer permits soaking, place the open press in warm, soapy water until the residue softens. Try brushing a small area; if the garlic is still hard, give it more time instead of scrubbing harder. There’s no need to leave it soaking overnight.
For a stubborn blocked hole, use the supplied cleaning tool after soaking. If you don’t have one, work the brush from both sides of the plate and rinse between passes.
Skip the vegetable oil spray. Start with soaking and brushing, which avoids adding another residue that you’ll need to wash away. If you’ve already used cooking oil on the press, wash it with dish soap rather than relying on a water rinse alone.
Can a garlic press go in the dishwasher?
Only if your particular model is labeled dishwasher-safe. For example, OXO lists its Garlic Press with Built-In Cleaner as dishwasher-safe, but that doesn’t establish the care requirements for another press.
Remove the garlic scraps first, open or separate any parts as directed, and follow the manufacturer’s loading instructions. After washing, check that the holes are clear and let the press dry fully. If you can’t confirm dishwasher compatibility, hand-wash it.
Make the next cleanup easier
Give the press a quick rinse as soon as you finish using it, even if you’ll do the full wash after dinner. Keep its cleaning attachment with the press so you don’t have to hunt for it later.
The same small kitchen brush can help clean the grooves of a citrus juicer or the crevices of other washable utensils. Follow each tool’s care instructions and keep fingers clear of sharp edges. For a garlic press, though, prompt rinsing and a little brushing are usually all the cleanup routine needs.
Related Posts:
 Garlic Galore: Your Guide to Freezing Garlic
 Delightful Home-Roasted Garlic: How to Make Roasted Garlic
 How much garlic powder to replace fresh garlic…
 The Art of Bill Prioritization: A Guide to Managing…
 Banishing Odors from Your Fireplace with Ease
 Sprucing Up Your Crock Pot: Banishing Burned-On…
 Freeze with Ease: Alcohol in Your Freezer-Friendly Dishes
 The Guide to Sanitizing Cutting Boards With Ease